Powerful Content Staging in TYPO3 with Workspaces

If you need to publish or update content in multiple languages at the same time, or involve others to sign off or edit content before publishing, then content staging is the solution you’re looking for. Did you know TYPO3 solves this out of the box with the Workspaces module? You can even share live previews without making people sign into your TYPO3 backend (they don’t need to have backend access at all).
This post is part of our Workspaces Series
An everyday challenge for editors
The main reason for using a CMS is to enable editors to change the content on your website without involving developers.
But what if you need to make a series of changes that only make sense if they are published at the same time? What if you want to add a new page to your site and need to involve other people or get approval from other departments within your organization, say the legal department? How do you prepare content changes to your online presence that need to be rolled out across multiple languages on a given date?
There are several ways for editors to “make that work,” but every workaround has its drawbacks:
- Editors prepare new content on pages that are “hidden.” While the content is hidden from your regular website users and search engines, you cannot show the pages to other people for approval without granting them access to the backend—the new page simply is not accessible without a valid backend user session. Additionally, if you need to change content across multiple pages or want to proofread special display versions of your new content (like teaser listings for news articles), you might be unable to preview hidden pages.
- Editors prepare new pages and use “Hide in menu” instead. While this approach allows you to send a link for approval to someone without backend access, depending on your website regular users might also accidentally see your new pages or your content will get indexed by Google before you intended this to happen.
- Editors need to update existing pages. We’ve seen all kinds of workarounds, from using the “show content of this page” feature to duplicating full pages and updating a copy of the “live version” to prepare the change and some other even more creative ideas.
All of these fall flat once the change involves other kinds of records besides pages and content elements—news records, calendar records, contacts, products etc.
Wouldn’t it be nice if there was a way to stage content in a clean, easy to use and easy to understand way?
Actually, there is. And there has been for a long time. “Workspaces” is a concept that is part of the TYPO3 core. It is the perfect answer to these—and other—use cases. We use Workspaces extensively, including this blog. So, what is the Workspaces feature, and how does it work?
What is a Workspace?
A workspace in TYPO3 is like a separate environment where you can edit content, test your changes, group your changes, and preview everything you did within the TYPO3 backend—without changing your live website at all. Think of it as an “in-system copy” of your live website, where you can safely work on your changes, reorganize your content, and prepare everything you want to publish—without actually publishing anything to your live instance until you’re ready to do so.
How do Workspaces work?
For a first example let’s use the blog post you’re reading right now, and let me show you how we work with TYPO3 up until this post gets published.
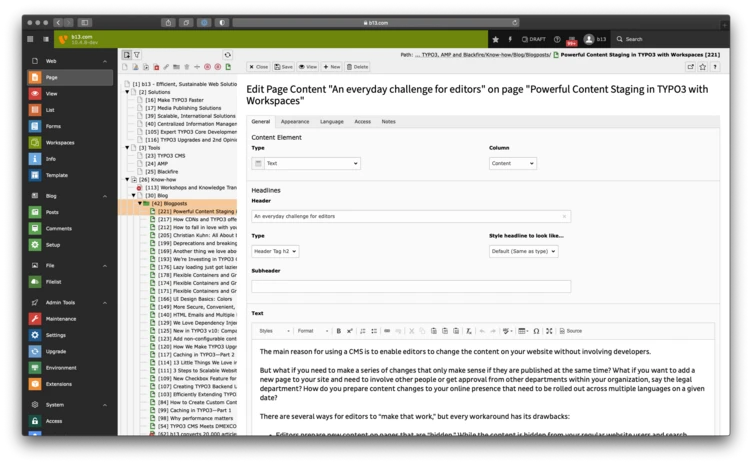
We use Workspaces and have set up a simple “Draft” workspace. With my editor account, before I start entering the content for this post, I make sure I am working in the “Draft” workspace. The backend features a green bar at the top to make it clear to the editor that I am working in a workspace. (Your system can have multiple workspaces, but more about that in a later post.)
We add a new blog post as a new page and add all our content to the English, and later the German, version of the page. Apart from a few visible clues that indicate to the editor that he or she is working in a workspace, and which pages have been edited, the backend experience is the same as that for a “default” TYPO3 instance.
Generating preview links
Once we are done, and satisfied with the result, we can switch to the “Workspaces” module. The module shows a list of changes within the current workspace and allows us to publish our changes to the live site. On top of the module window, the editor can create special preview links to share the current page in a workspace version. By default, these links will be valid for 48 hours, but you can change this in your configuration.
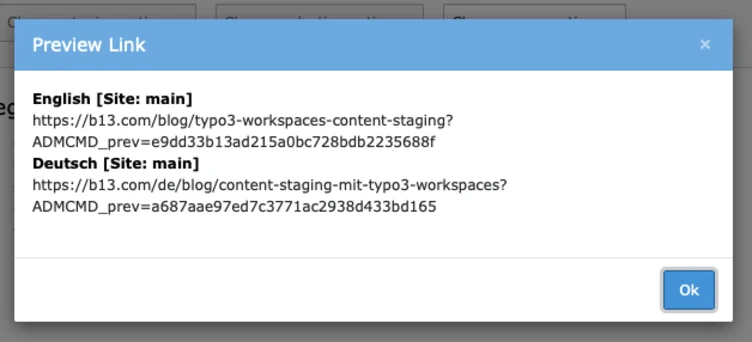
We can share these magic links with anyone we want to proof-read our blog post before publishing. Once someone clicks on that link the user will be logged into this particular Workspace (without needing an account or a backend login) and will be presented with a full, 100% accurate preview version of the page we just created. But wait, there’s more: This is not just a preview link for this particular page we created—the user is logged into the workspace. And that workspace is a 100% representation of what the website will look like if all the changes prepared within the workspace would be published to live. In our case, the recipient of our magic link will be able to read the new blog post, switch the language, use the menu, see the list of all blog posts—including the yet unreleased post—and so on. The user will not just be able to proof-read our new page, but everything else that could change as a result of the newly added content—think navigation, overview teasers, related articles, and more.
Pretty amazing, huh?
Previewing changes and comparing with the live version
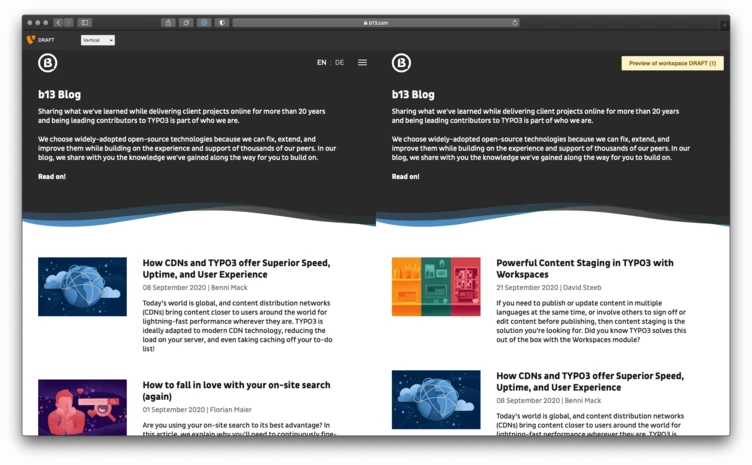
The editor has a preview window and, depending on what has changed and which URL is being previewed, is presented with some additional features and options. A split view for comparing the current version with the live version, for example. In our simple example, we can click on our “Blog” page that lists all the latest blog posts and compare the list view of the live instance with the version from our workspace. There are different viewing options (Slider, Horizontal, Vertical) that you can switch between, depending on what’s best for the layout your website is using.
Again, pretty amazing. By now you might be asking yourself, “Why would I not be using this?”
Publishing changes to live
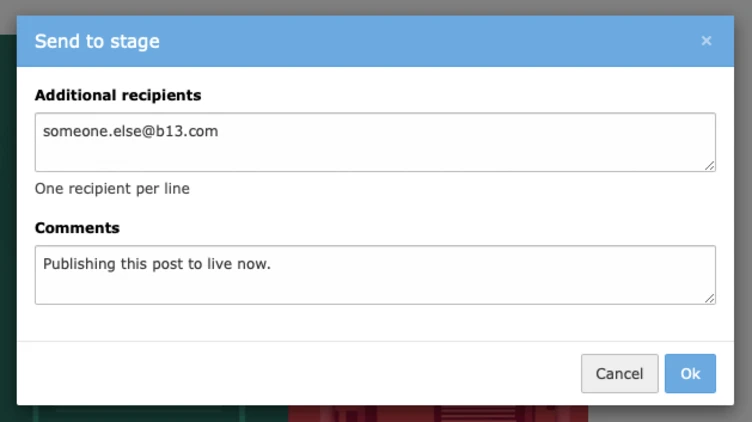
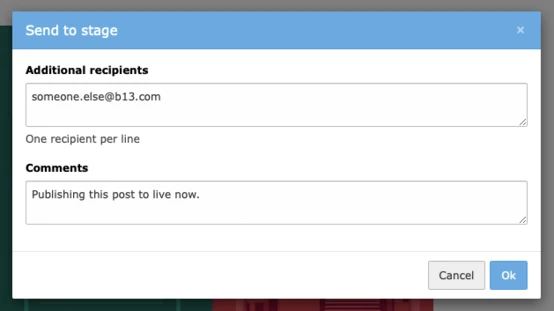
To finish our little example, we forgo all the workflow options that can be added to the configuration of your workspace and just click on the button “Publish to live” in the editor preview at the top. A simple form-popup is shown, allowing us to notify colleagues about the change of stage, and once we click “OK,” our changes are published and our blog post is live!
How to set up a simple workspace
So, if you’re ready to get started, here’s how to set up a simple Draft Workspace like the one we’re talking about in this blog post:
- Make sure you have TYPO3’s system extension “Workspaces” installed. If this extension is missing, run
composer req typo3/cms-workspacesand install the extension, or ask your developer team to do it for you. - Using the “List” module, create a new record of type “Workspace” in your installation’s page root (PID 0). You will need to have admin privileges to do this.
- In the create record form, add your workspace title (in our case “Draft”) and leave all other fields alone to use the default values.
- Go ahead and try it—change your active workspace using the Workspace Switcher Icon in the top menu bar.
There’s more!
In this post, I showed a very basic use-case for TYPO3’s Workspaces feature: Creating a new page not visible to the world, creating real-life previews that sit “inside” your website and allow you to really judge what you’re about to publish, and creating preview links to let other people see an integrated preview of what’s about to go live, including your website’s design, menus, etc.—all without resorting to any workarounds or hacks.
But there’s a lot more to discover:
- Create multiple workspaces for different purposes or user groups.
- Limit users to only be able to work in draft workspaces, and reserve the option to publish to live to your chief editors.
- Add additional custom stages for your publishing workflow to make sure different departments in your organization sign off on new content before publishing.
- Prepare a number of changes and publish all of them at once.
We have been working with Workspaces for a long time and started using this feature back in TYPO3 v4.5. It is one of the best under-used features of our favorite CMS. That’s why we’re investing heavily in polishing the experience, removing bugs and inconsistencies in edge-cases, streamlining working with workspaces, and even hired someone to focus on this killer feature in TYPO3 core.
In upcoming blog posts, we will go into more detail about how to set up more workflows and custom stages, and show some more real-life use-cases we see in our projects.

