Flexible Containers and Grids for TYPO3, Part Two

A simple example: How to Add a Two-Column Grid as a Flexible Content Element.
I will show you a simple example to help you get started with the TYPO3 Container extension: How to add a two-column container element. With it, your editors can easily add a page section that splits that part of the content area into two columns. In our next post, I will cover a more complex example.
In Part 1 of this series, Flexible Containers and Grids for TYPO3, we introduced the basic concepts around layout “containers” for TYPO3. We explained how many projects end up needing more layout flexibility than TYPO3 offers out-of-the-box, how many existing solutions came with the tradeoff of added complexity, cause difficulties when upgrading, and that b13’s new Container extension is here to help us with all of this! Our extension allows the addition of layout “containers” to content areas that can contain modules and elements as optional variations to the main layout while following TYPO3 core best practices, keeping your site flexible, maintainable, and easy to upgrade.
This post is part of our Container Series
Get Started: Install Container
To get started, you’ll need to have b13’s Container extension installed—if not, go get it using Composer:
composer req b13/container
Configure a Two-Column Container
To create a simple container element we need to do three things:
- Register our container element as a CType
- Add TypoScript configuration for our CType
- Add a Fluid Template for frontend output
Register our Container Element as a CType
To register our element we use the function “configureContainer” from our extension:
1
2
3
4
5
6
7
8
9
10
11
12
13
14
15
\TYPO3\CMS\Core\Utility\GeneralUtility::makeInstance(\B13\Container\Tca\Registry::class)-> configureContainer(
    (
        new \B13\Container\Tca\ContainerConfiguration(
            '2col-container',
            '2 Column Container',
            'Insert an element dividing the content area into two columns',
            [
                [
                    ['name' => 'Left Column', 'colPos' => 201],
                    ['name' => 'Right Column', 'colPos' => 202]
                ]
            ]
        )
    )
);
Let’s look at the configuration steps in the code in detail
- we register our CType name (“2col-container”)
- we add a name for our CType
- we can add a description for our container element (used for the New Content Element Wizard)
- we add the backend layout configuration for displaying this container element in the backend—the array is identical to the one you would write out in the TypoScript array form for a backend layout. Note that we assign a “colPos” value to each container area.
A look at the backend
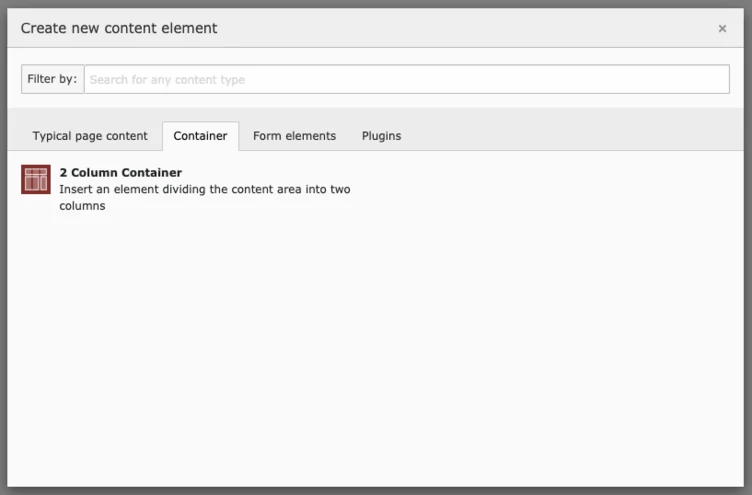
This simple configuration creates our 2-column content element. It adds a “Container” tab to the New Content Element Wizard and allows you to select the new “2 Column Container” element:

All container elements are automatically added to this tab in the wizard by default. You can opt-out of this behavior for individual container elements if you need to. If you’re running TYPO3 v10, all automatically added container elements have the new “saveAndClose” option set to “true” (this, also, can be changed for each container—see Part 3 for details).
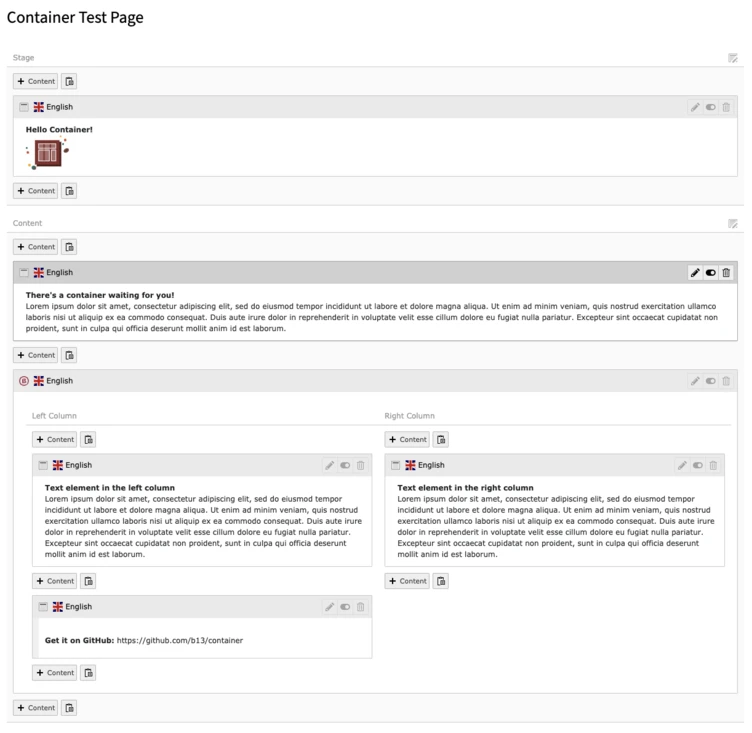
Once you have saved the newly created element you will see a simple two-column element within your other page content, allowing you to add further content elements within the left and right columns:

Add Frontend output
We need to add a TypoScript configuration for our element, as well as a Fluid Template for the frontend output of this container.
Add this configuration to your TypoScript setup:
1
2
3
4
5
tt_content.2col-container =< lib.contentElement
tt_content.2col-container {
  templateName = 2col-container
  dataProcessing.13 = B13\Container\DataProcessing\ContainerProcessor
}
This snippet will invoke ContainerProcessor to process the child elements of each container area and make the content available for output in our Fluid Template. It also instructs TYPO3 to use a template called “2col-container” located in your template path for your content elements to render the frontend output (assuming your template root path is set in lib.contentElement).
If you debug the Fluid template, you will see that it contains everything you need (and would expect) to work with it:

You have all the data from the content element itself (read: the container element) as well as two variables containing the data from the child records. Every child record holds the complete database record of the child content element, including an additional key called “renderedContent,” which is a representation of that content type’s rendered content (of course!). In most cases you can use that to output individual container child elements as needed.
So, in our example, the Fluid frontend template would look something like this:
1
2
3
4
5
6
7
8
9
10
11
12
<div class="b_multicolumn b_multicolumn--twocols">
	<div class="b_multicolumn__col">
		<f:for each="{children_201}" as="element">
			{element.renderedContent -> f:format.raw()}
		</f:for>
	</div>
	<div class="b_multicolumn__col">
		<f:for each="{children_202}" as="element">
			{element.renderedContent -> f:format.raw()}
		</f:for>
	</div>
</div>
And with that, your two-column container element is ready to use.
That was fun, what now?
In Part 3 of this series we will look at a more complex example.
Considering Upgrading to TYPO3 v10?
Layout-relevant issues are just one of the areas you need to consider when planning an upgrade. We will be happy to help you analyze your projects for the whole gamut of upgradability challenges and opportunities.
